
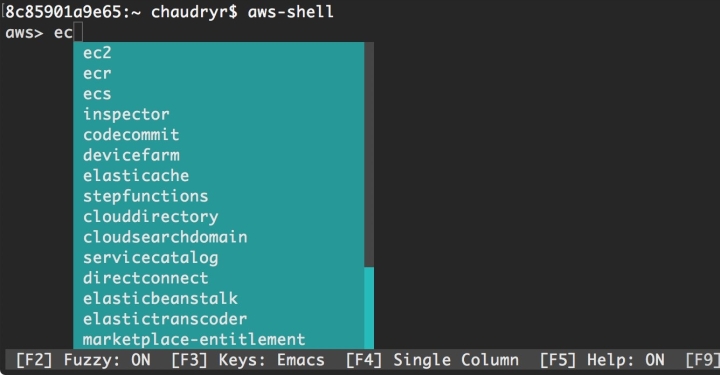
AWS-Shell is an integrated shell (with autocomplete) for working with AWS CLI. Remembering or searching for commands is a daunting task and takes up a lot of time. The AWS-Shell comes in really handy by enabling the users to quickly select commands from the autocomplete dropdown.
Let’s install aws-shell to begin with. You can do that by running the install command as shown below:
If you already have pip and supported version of python installed, you can do:
pip install aws-shell
Or with hombrew:
brew install aws-shell
For more information, please see https://github.com/awslabs/aws-shell.
Once aws-shell has been installed successfully, we can now start to play with it.
On your command-line, type:
aws-shell
Once you see the aws> prompt, you are ready to start using the aws-shell to interact with services in your aws account. Let’s try some commands to see it in action.
Let’s create an S3 bucket. This is done using the s3api create bucket call. According to the AWS documentation, regions other than the us-east-1 require the appropriate LocationConstraint to be specified in order to create the bucket.
s3api create-bucket --bucket bucket_name --region ap-southeast-2
--create-bucket-configuration LocationConstraint=ap-southeast-2
List your s3 buckets.
s3 ls
List contents of a bucket.
s3 ls s3://bucket_name
Copy a file to S3 bucket. It can be local file on your computer in the current directory or a file residing in another s3 bucket.
s3 cp test.txt s3://bucket_name
s3 cp s3://src_bucket/file.txt s3://dest_bucket
Describe EC2 instances.
ec2 describe-instances --instance-ids i-abcpqrxyz
Stop an EC2 instance.
ec2 stop-instances --instance-ids i-abcpqrxyz
Remove your bucket (optional). –force flags comes handy when the bucket has content and you want to remove the bucket along with its content.
s3 rb s3://bucket_name --force
Cheers…!
